구글 애널리틱스 설정 방법
Google Analytics는 웹 트래픽을 보고 이해하는 데 사용됩니다.
그것은 무료이며 사용하기 쉽습니다.
많은 사용 사례에 맞게 사용자 지정할 수 있습니다.
기본적으로 작동합니다.
설정하는 것이 빠릅니다. 오늘 통찰력을 얻으십시오!
내 무료 웹사이트 만들기 ❯Google Analytics에 대한 읽기를 건너뛰십시오. 첫 번째 단계로 바로 안내해 주세요. 첫 번째 단계로 이동
구글 애널리틱스란?
Google Analytics는 웹 분석 솔루션입니다.
Google에서 개발 및 지원합니다.
최신 버전은 Google 애널리틱스 4입니다.
잠재고객, 페이지 조회수, 세션, 인구 통계 및 이벤트와 같은 데이터를 보는 데 사용할 수 있습니다.
Google 애널리틱스를 활성화해야 하는 이유
웹 트래픽을 이해하여 더 나은 결정을 내리십시오.
판매 유입경로를 이해하고 개선합니다.
실험을 통해 배우십시오(예: a/b 테스트).
Google에는 Google Optimize라는 또 다른 솔루션이 있습니다. 이 솔루션은 테스트용으로 만들어졌습니다.
누구를 위한 Google 애널리틱스
Google Analytics는 웹사이트가 있는 모든 사람에게 유용합니다.
누가 귀하의 사이트를 사용하고 사이트와 상호 작용하는지에 대한 정보를 제공합니다.
또한 인터페이스는 이해하기 쉽습니다.
서비스를 사용하고 탐색하는 데 분석 배경이 필요하지 않습니다.
Google 애널리틱스를 단계별로 설정하는 방법
Google Analytics는 글로벌 웹사이트 태그(gtag.js) 또는 Google 태그 관리자 의 두 가지 방법으로 설정할 수 있습니다 .
가장 쉬운 방법은 글로벌 웹사이트 태그를 사용하는 것입니다.
이 자습서에서는 글로벌 웹사이트 태그 접근 방식을 사용합니다.
준비
사용할 코드 편집기를 결정하고 환경을 설정하십시오.
W3Schools는 W3Schools Spaces 라는 사용하기 쉬운 코드 편집기를 만들었습니다 . 몇 번의 클릭으로 가입하고 시작하세요.
무료로 시작하세요 ❯코드를 입력할 준비가 되도록 index.html 파일을 만듭니다 .
모든 설정. 가자!
Google Analytics 설정: 글로벌 웹사이트 태그
1단계: Google 애널리틱스 계정 만들기
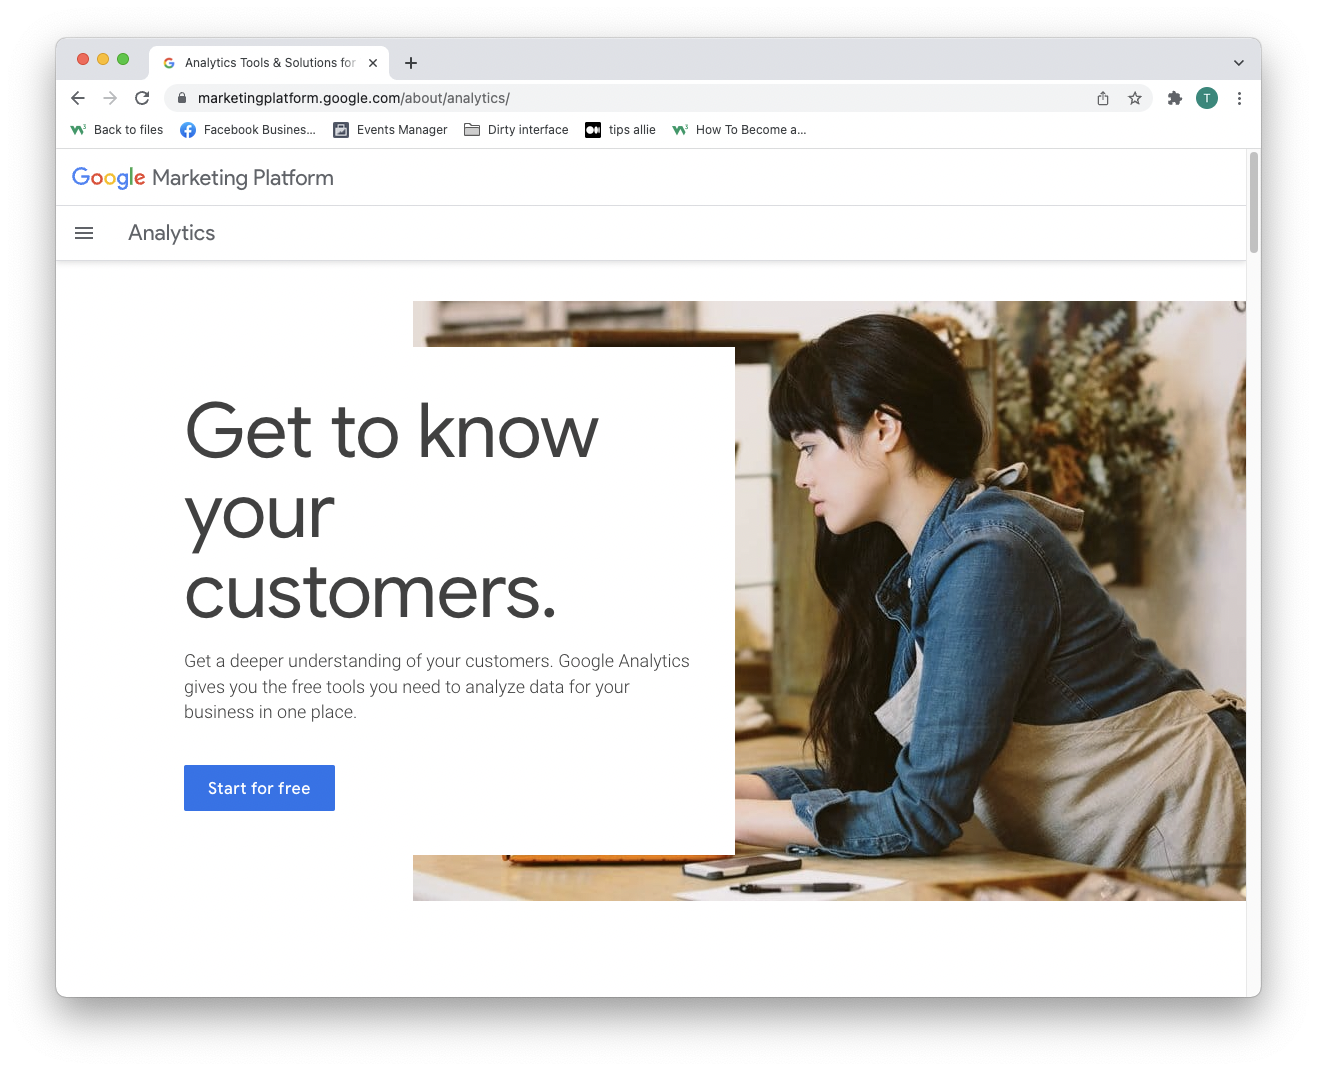
Analytics로 이동: 계정 만들기 또는 Analytics에 로그인
위 단락의 링크를 클릭하면 Google Analytics 방문 페이지로 이동합니다.
"무료로 시작" 버튼을 클릭합니다.
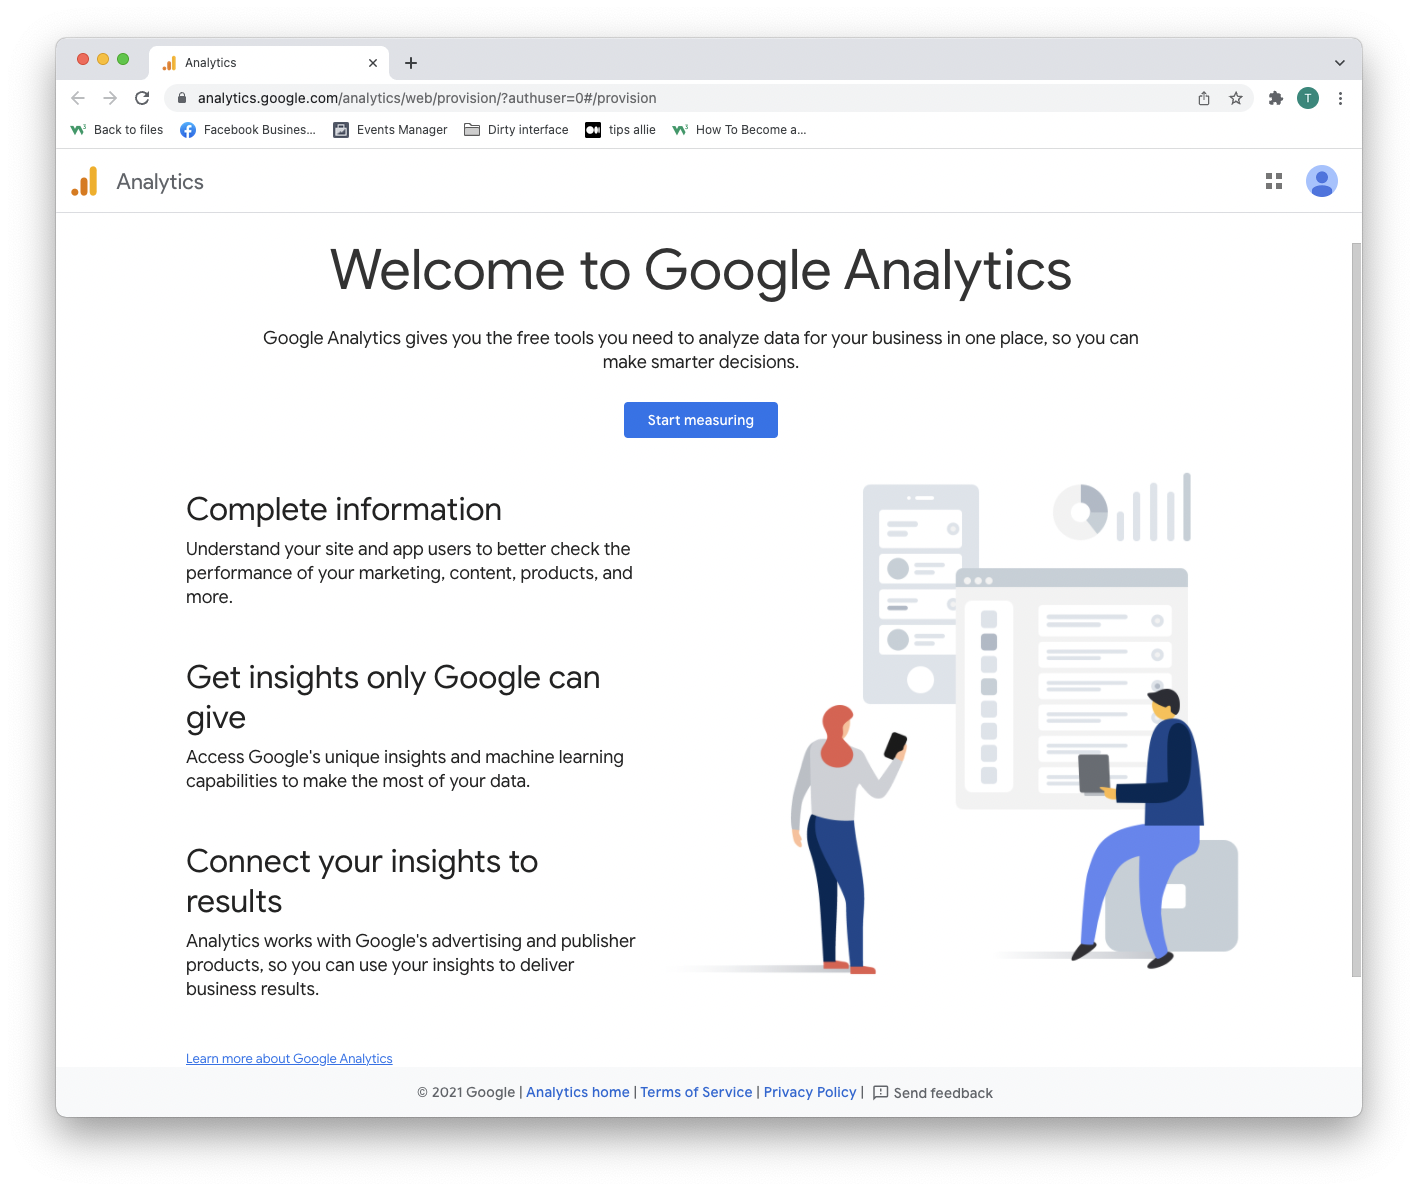
2단계: 시작 페이지 입력
계정을 만들거나 로그인한 후 솔루션에 오신 것을 환영합니다.
계속 진행하려면 "측정 시작" 버튼을 누르십시오.
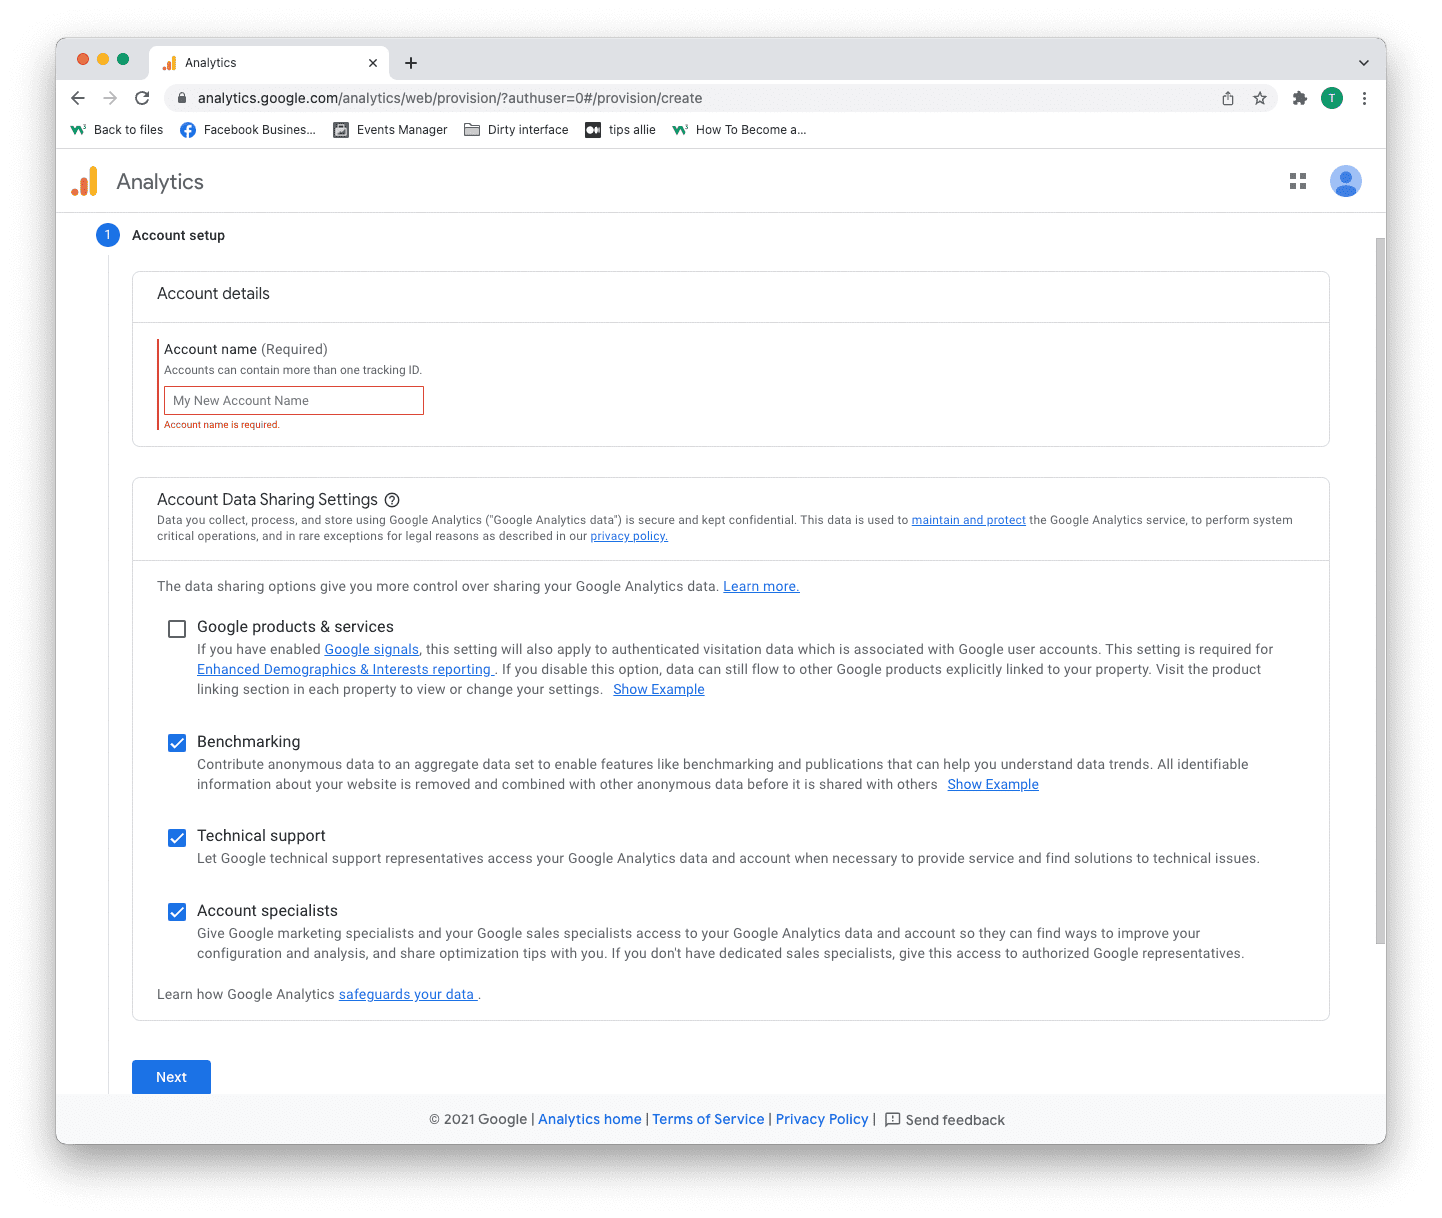
3단계: 계정 설정
여기서 두 가지 결정을 내려야 합니다.
- 계정 이름을 입력합니다.
- 공유할 데이터를 결정합니다.
- "다음" 버튼을 클릭합니다.
하나의 계정에는 둘 이상의 추적 ID가 있을 수 있습니다. 한 계정으로 둘 이상의 웹사이트를 추적할 수 있습니다.
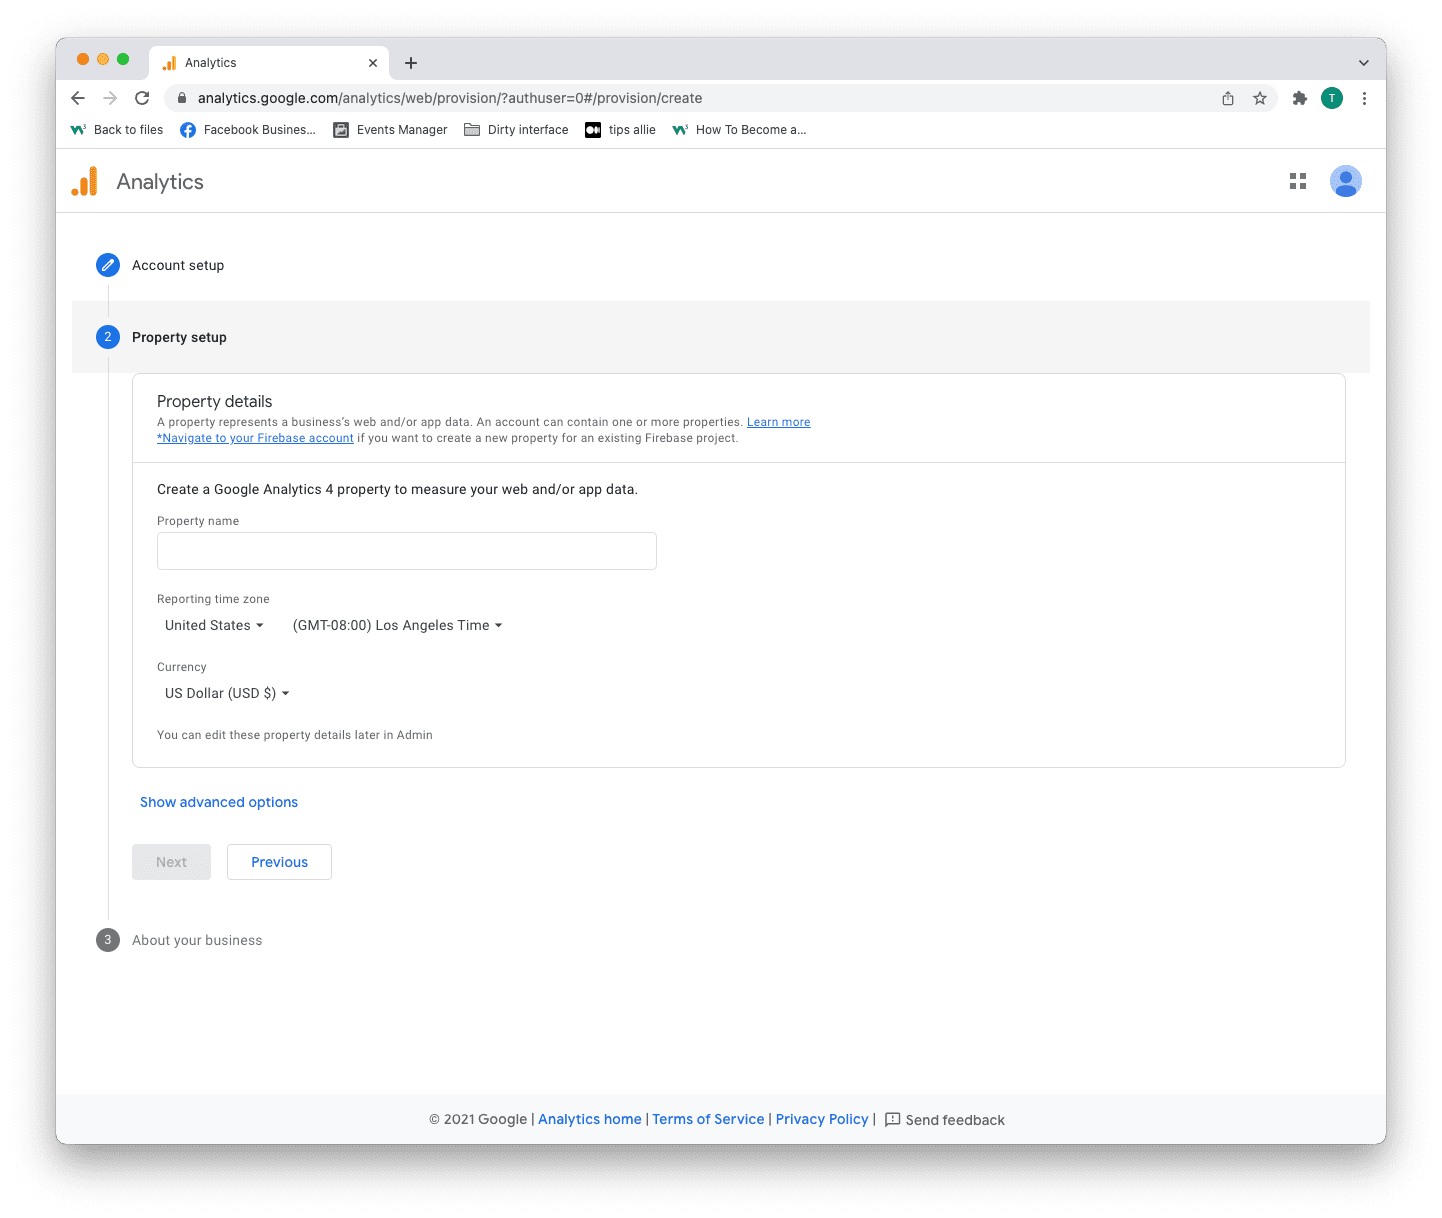
4단계: 속성 설정
속성은 웹사이트, 애플리케이션, 링크 트리 등과 같이 측정하는 서비스입니다.
- 속성 이름을 입력합니다.
- 시간대를 입력하세요.
- 사용하는 통화를 입력하세요.
- "다음" 버튼을 클릭합니다.
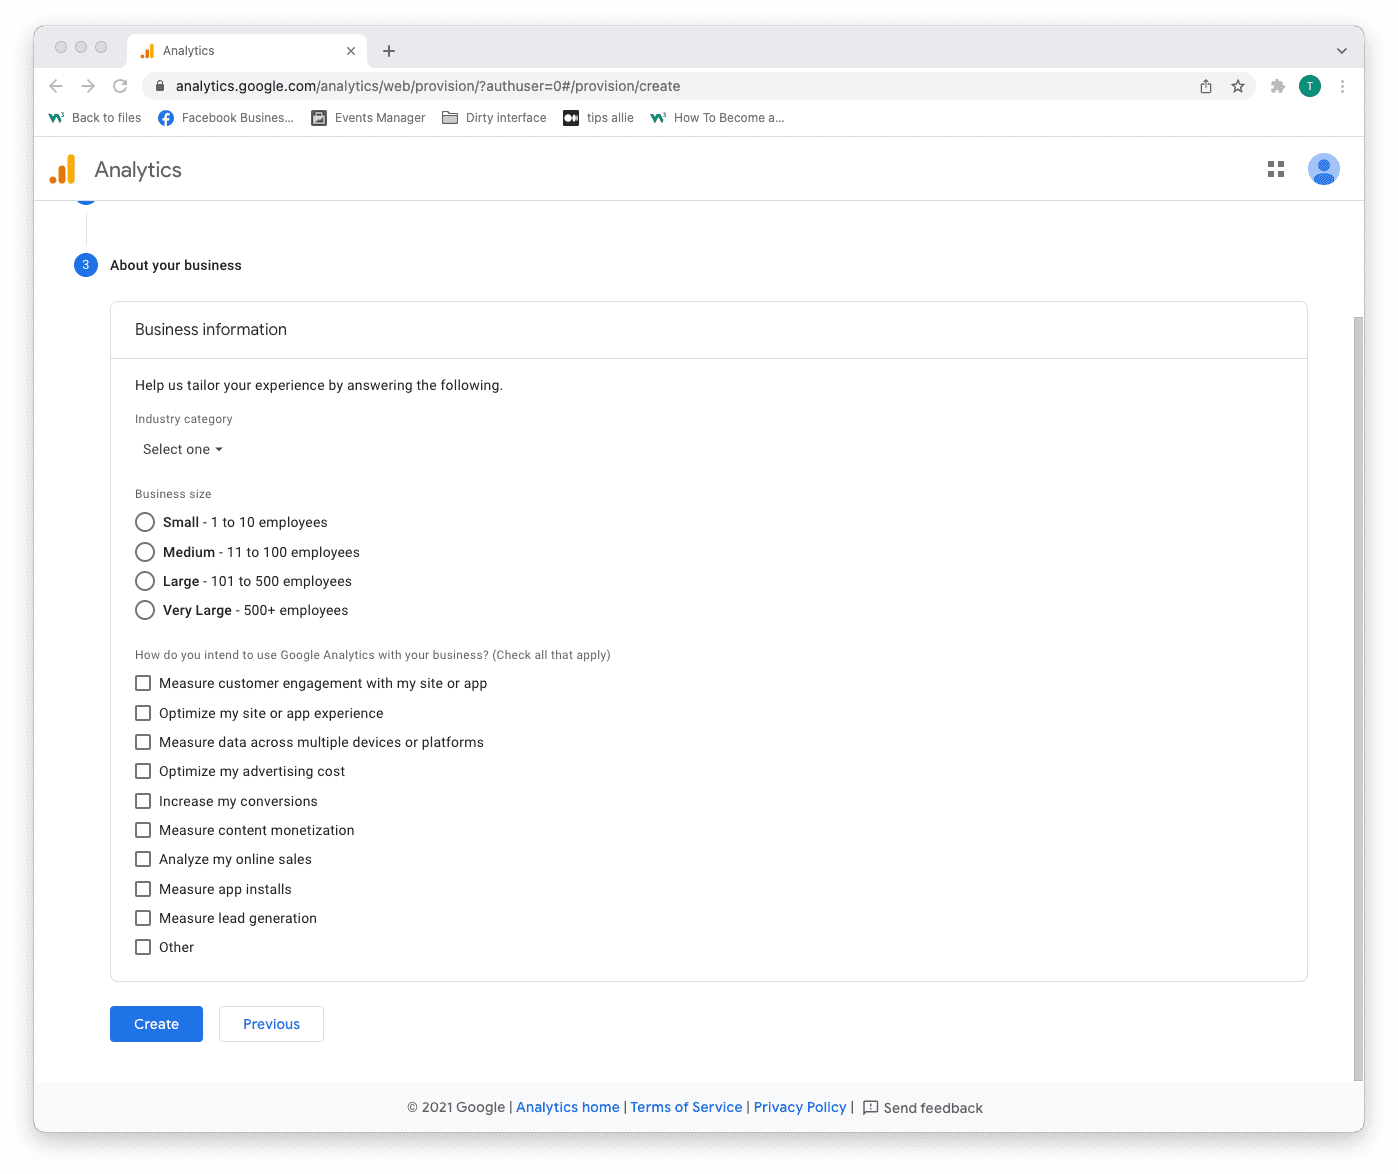
5단계: 비즈니스 정보 추가
Analytics는 귀하의 경험을 맞춤화하기 위해 정보를 사용합니다.
- 업종 카테고리를 선택하세요.
- 기업 규모를 선택하세요.
- Tick the boxes for how you are planning to use Analytics.
- Click the "Create" button to proceed.
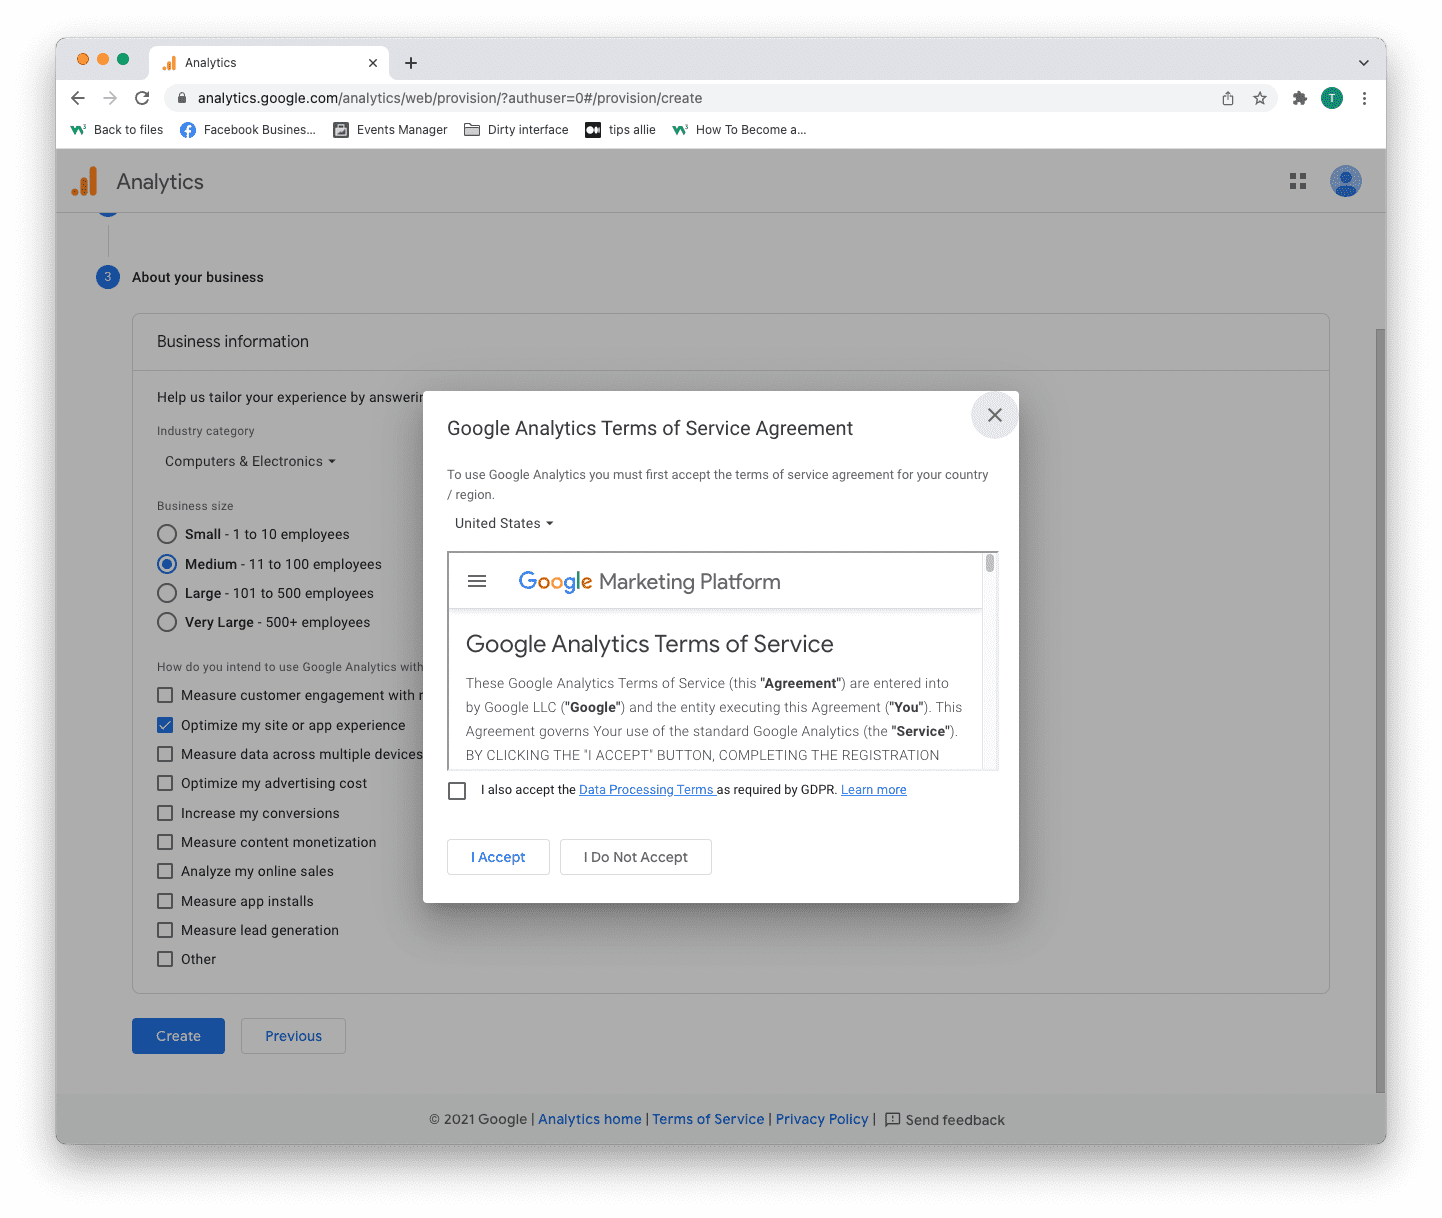
Step 6: Terms of Service Agreement
Read and understand the terms of service.
Tick the GDPR box and click the "I accept" button if you agree.
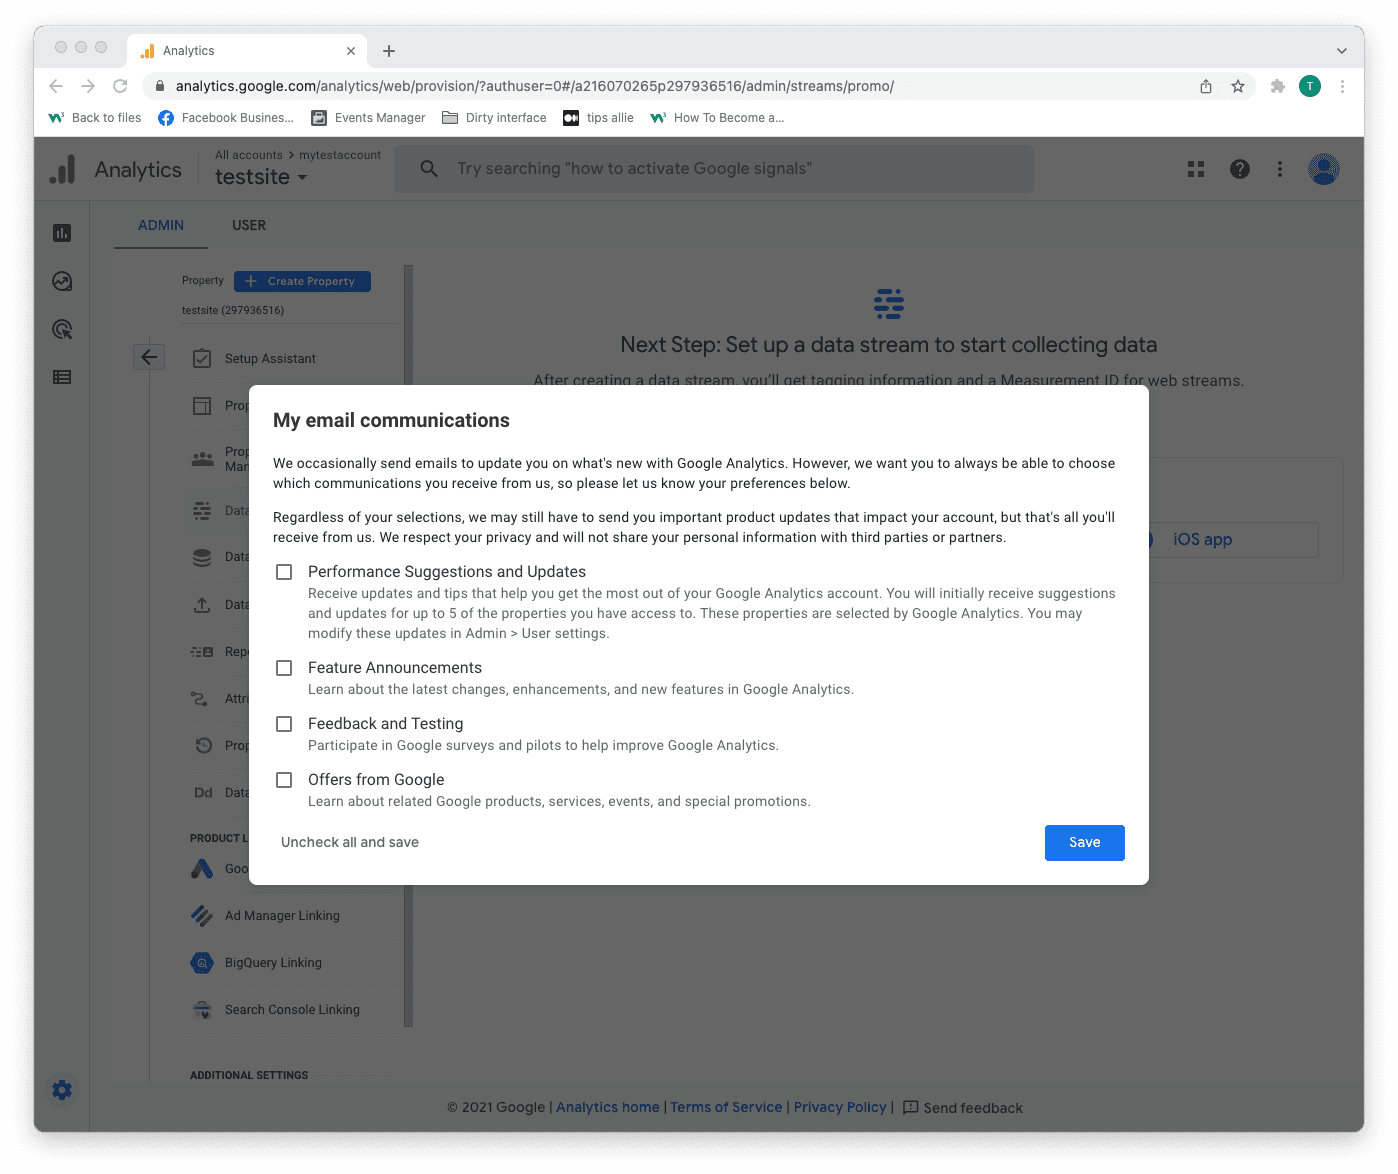
Step 7: Email subscriptions
- Tick or uncheck all boxes.
- Click the "Save" button to continue.
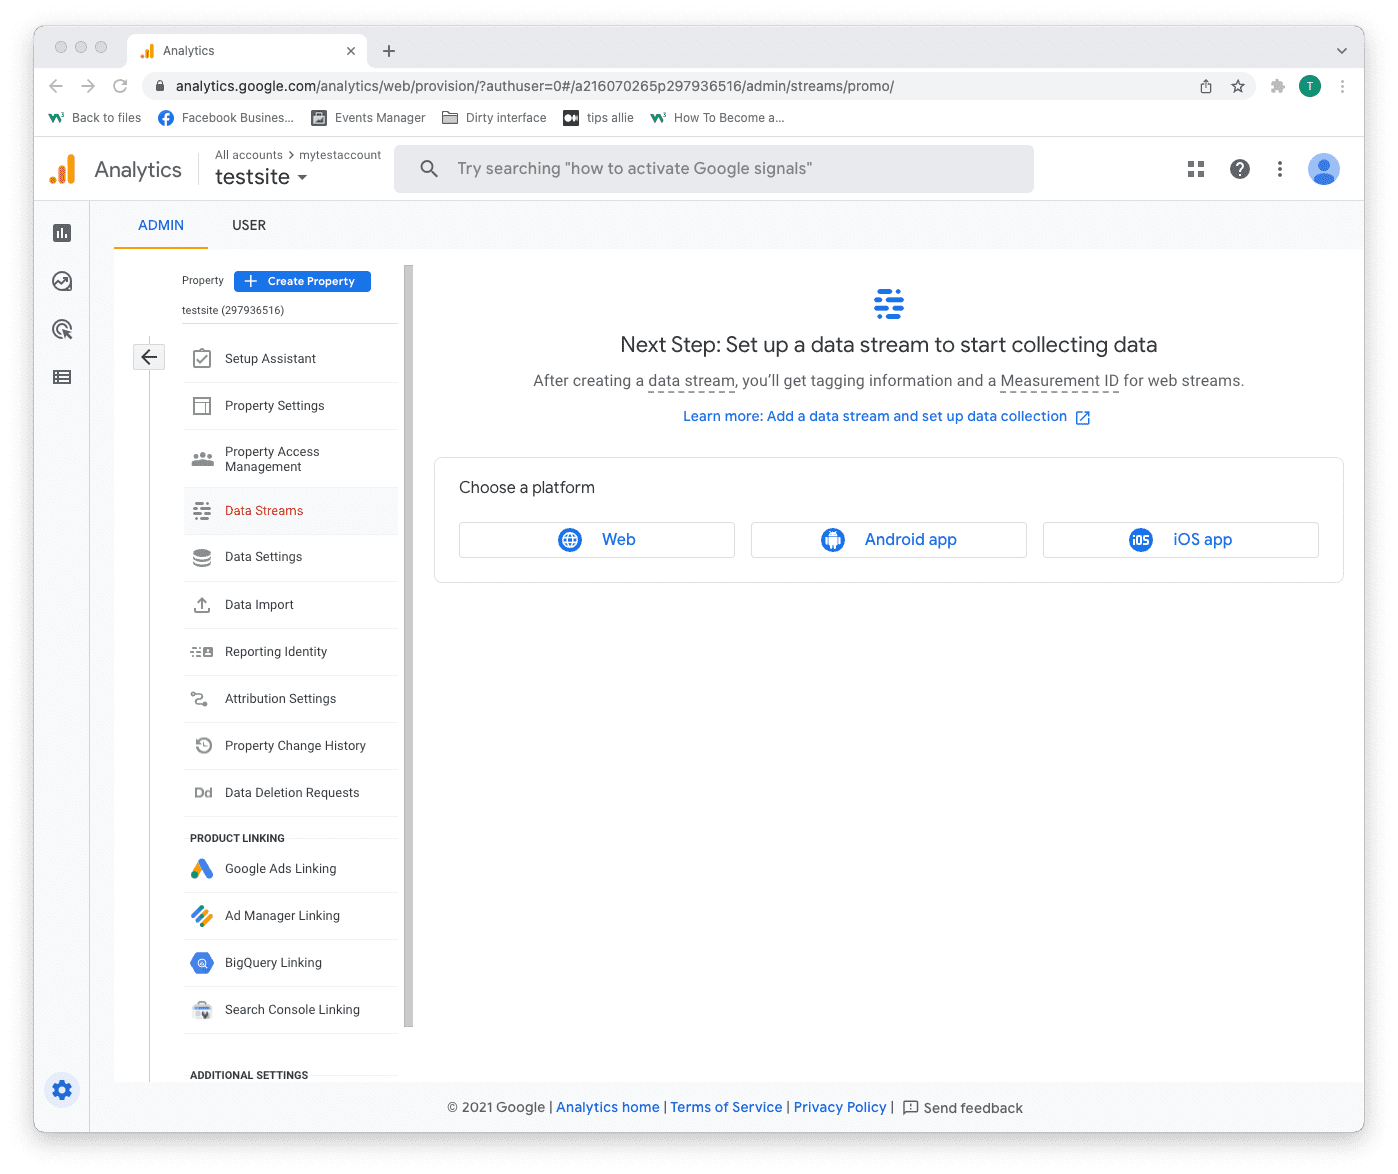
Step 8: Select platform
Chose the platform where you are collecting data.
Then, click the relevant platform to continue.
We are continuing with "Web" as the example in this tutorial.
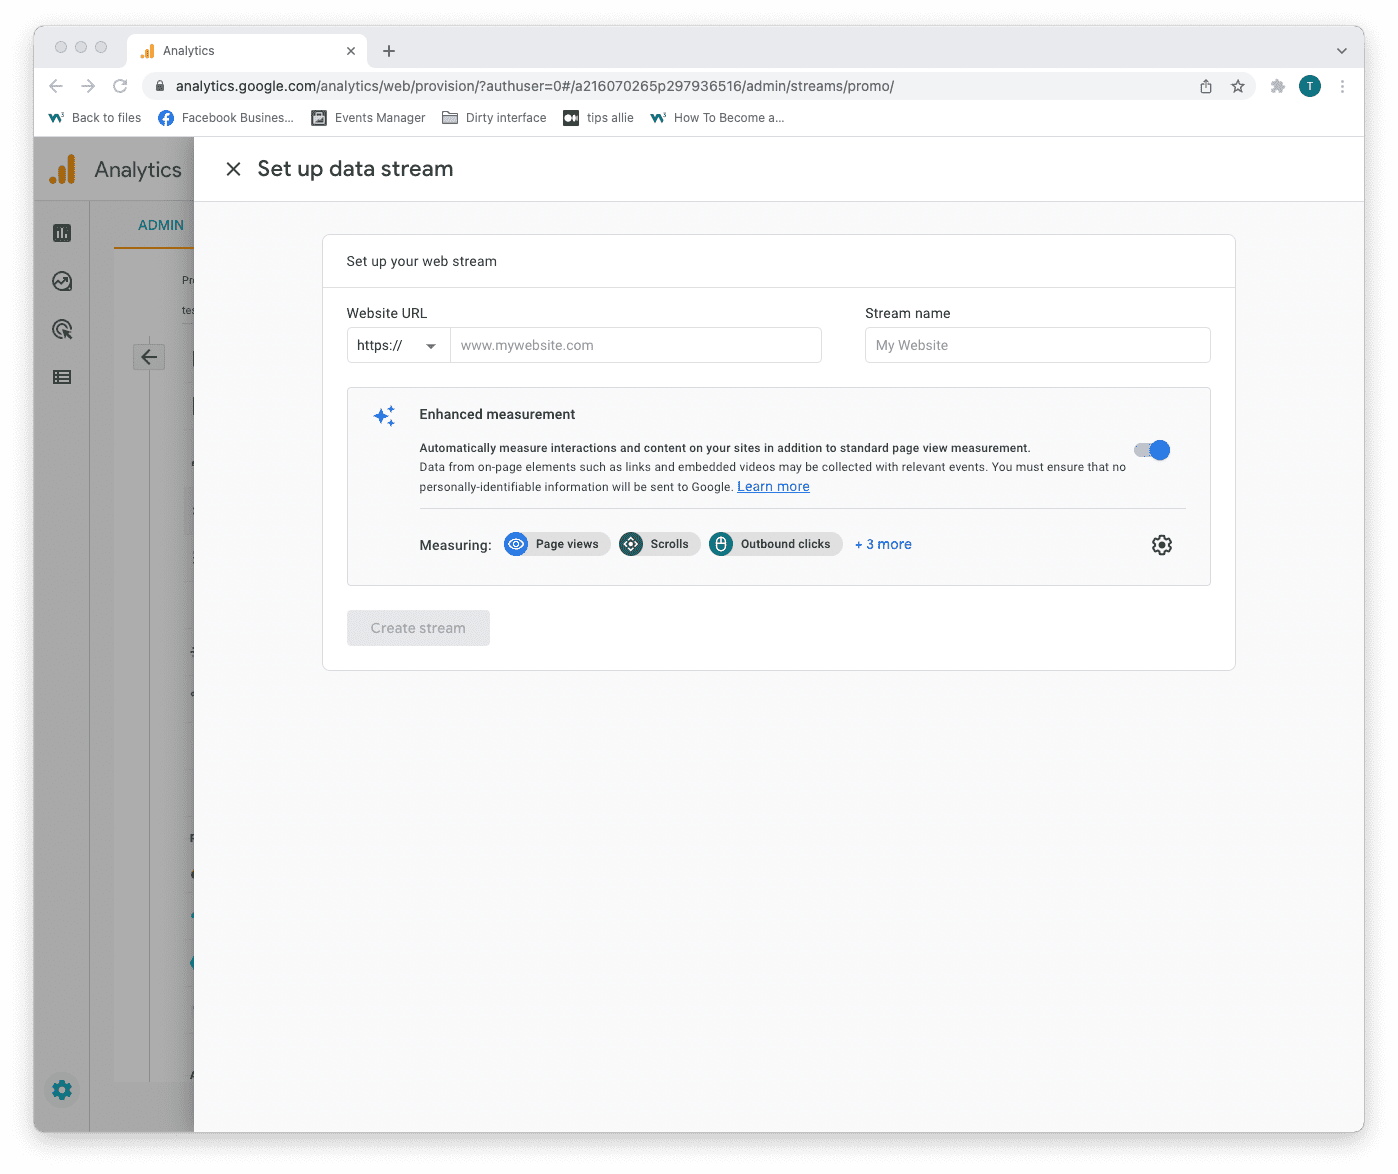
Step 9: Data stream setup
Enter data stream details.
- The URL to your site.
- The name that you want to give the stream.
- Decide if you are to enable enhanced measurement or not.
- Click on the "Create stream" button to continue.
The enhanced measurement can give the data more context. Improving your understanding of the traffic.
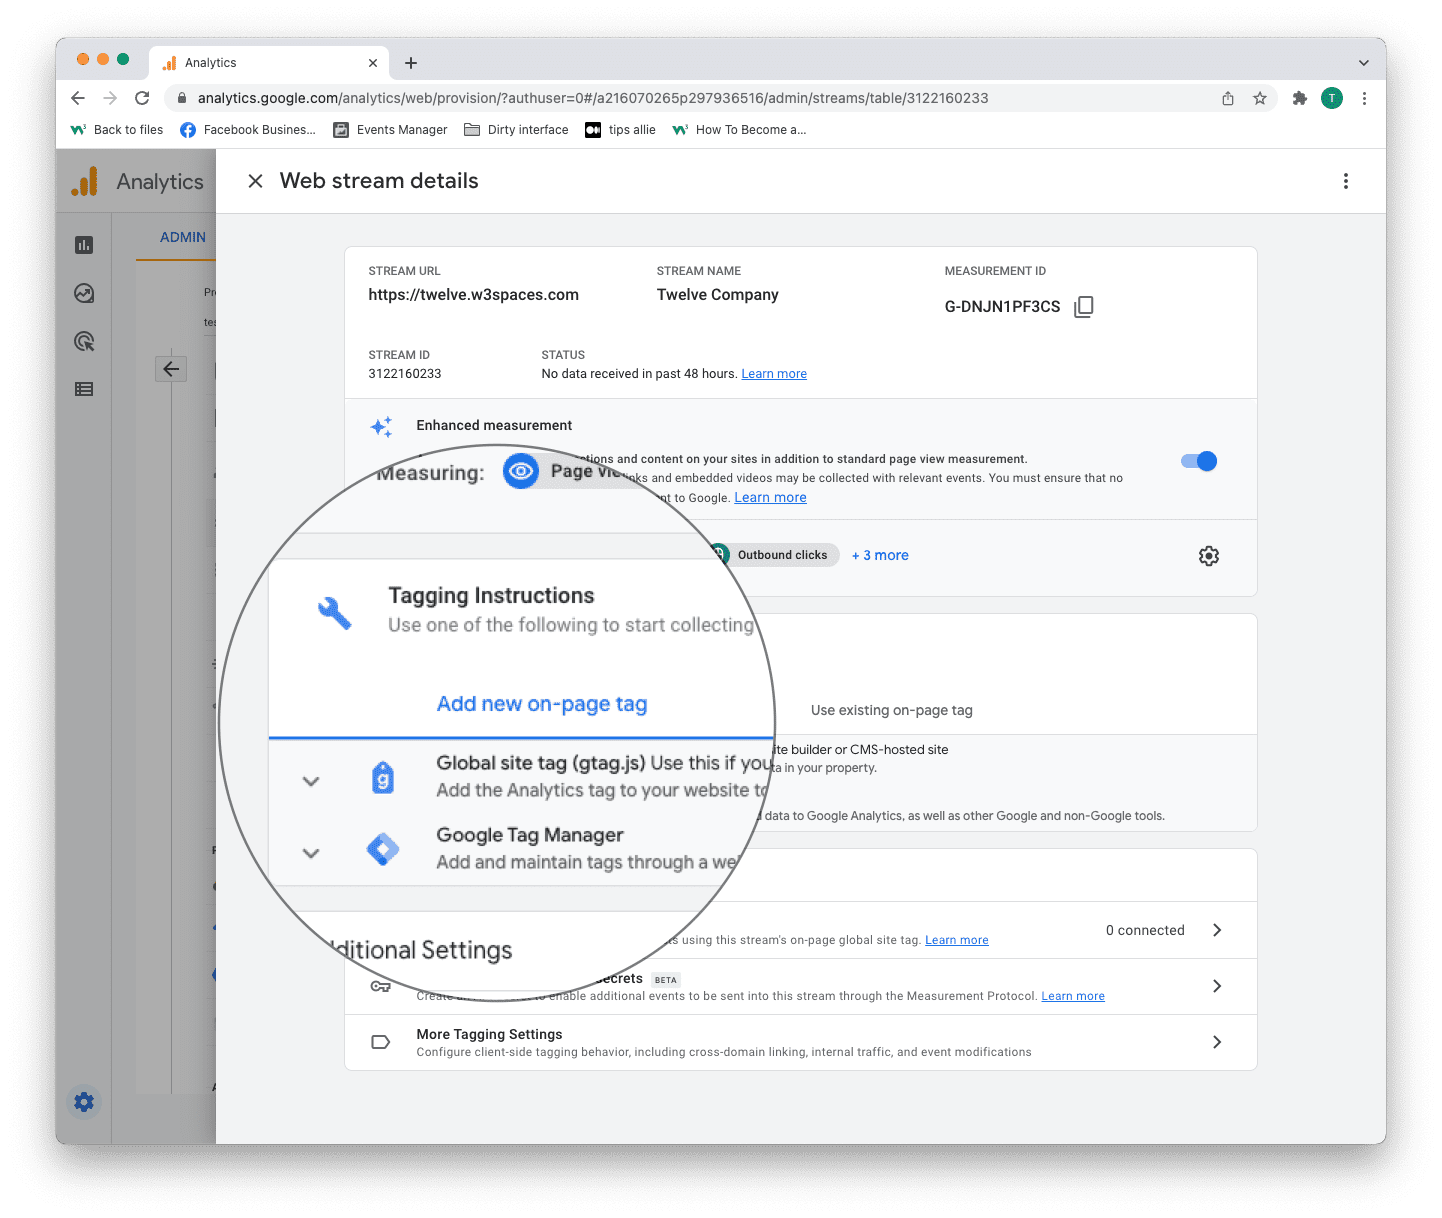
Step 10: Web stream overview
Here you can see a detailed overview of the web stream.
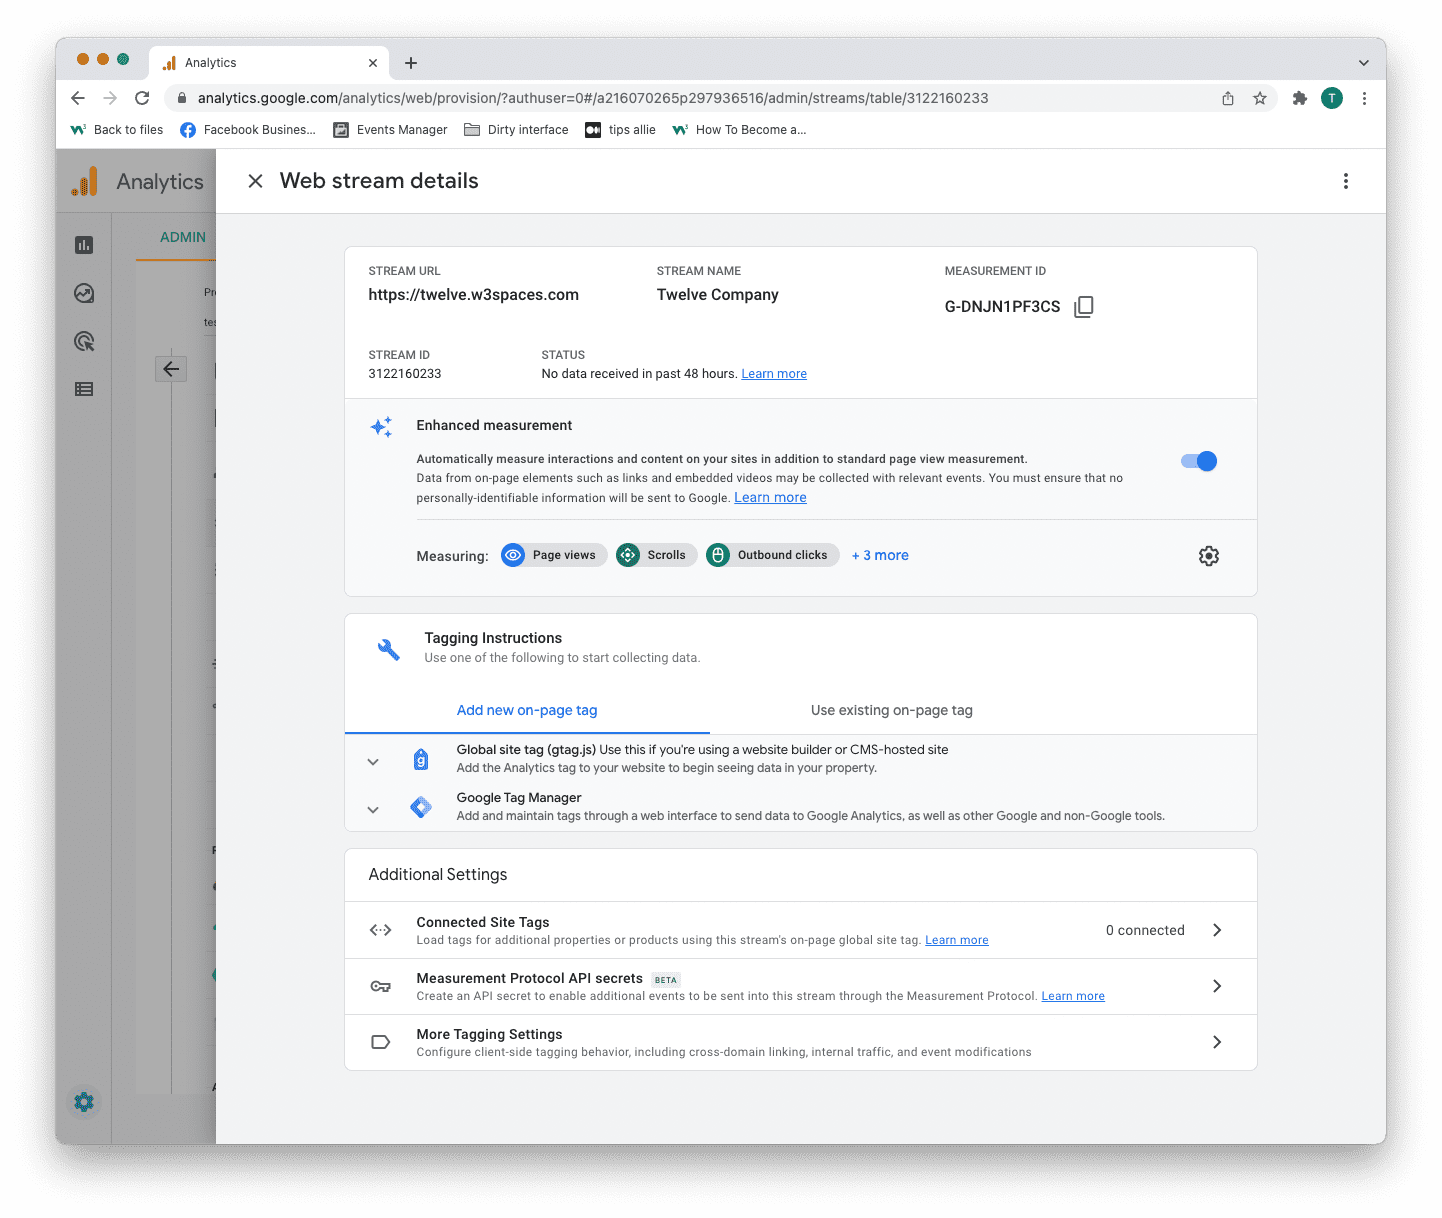
Here are the key takeaways from the overview.
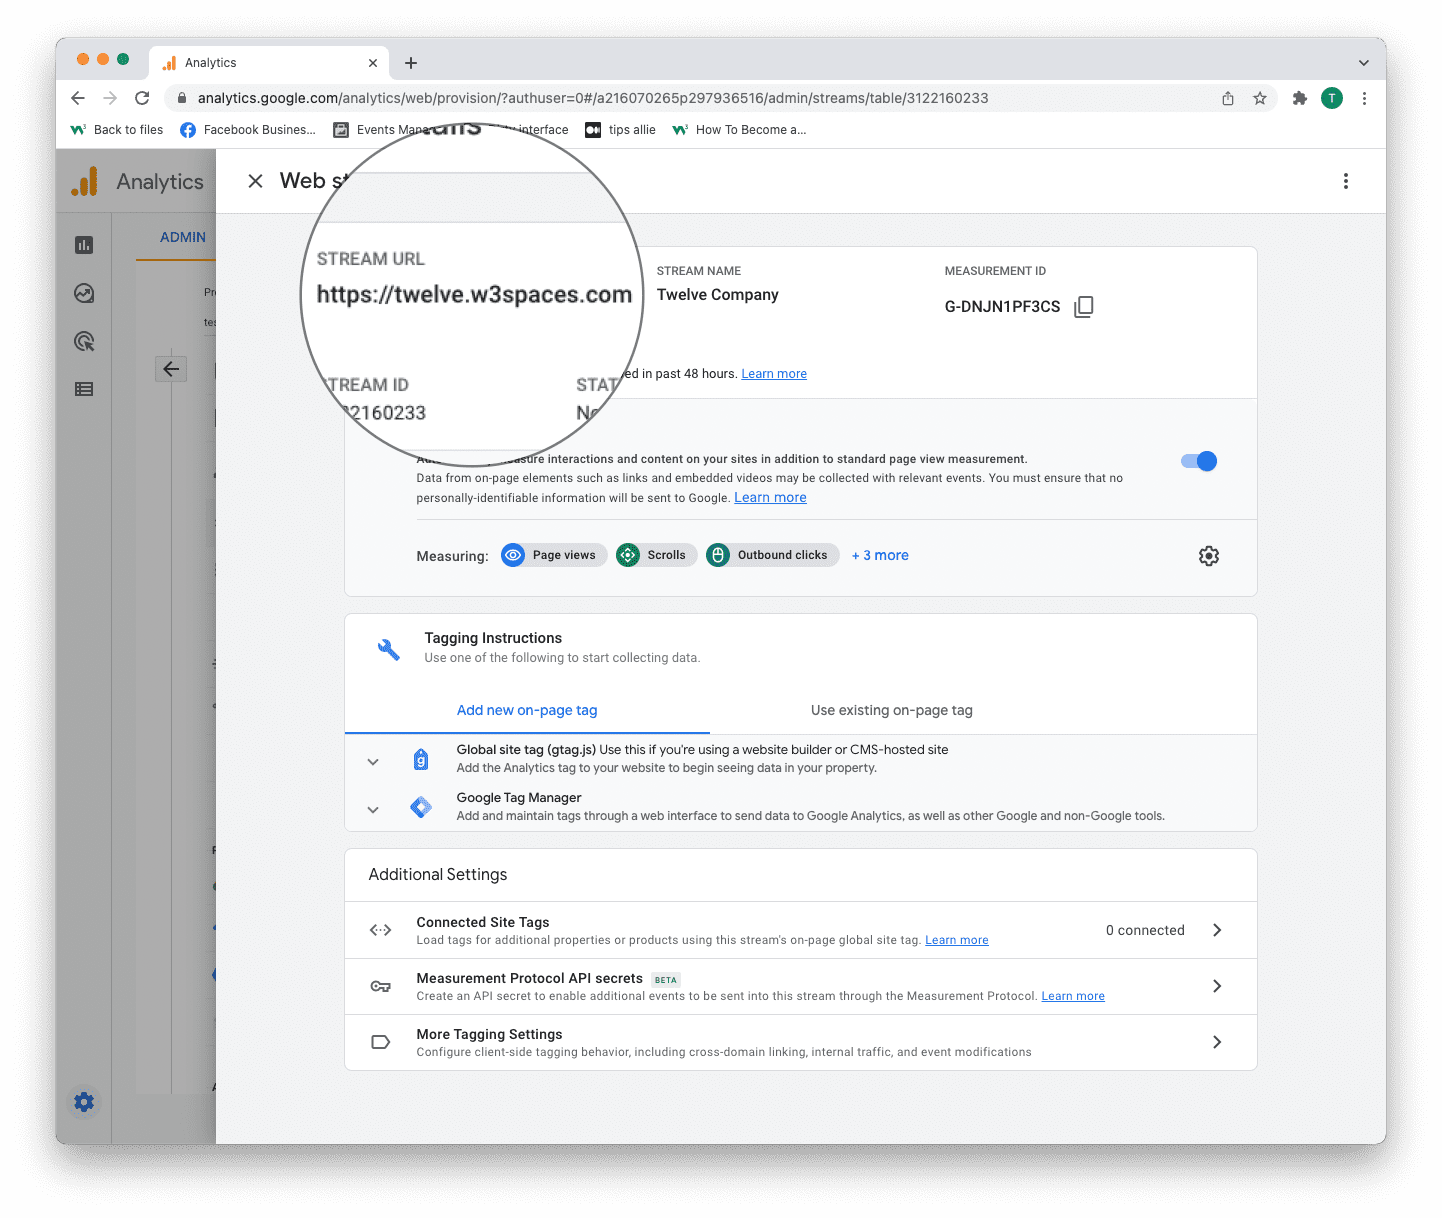
1. Stream URL.
The Stream URL is the link to the connected site.
2. Measurement ID
The Measurement ID is the identifier for your data stream.
It has a format of G-XXXXXXX.
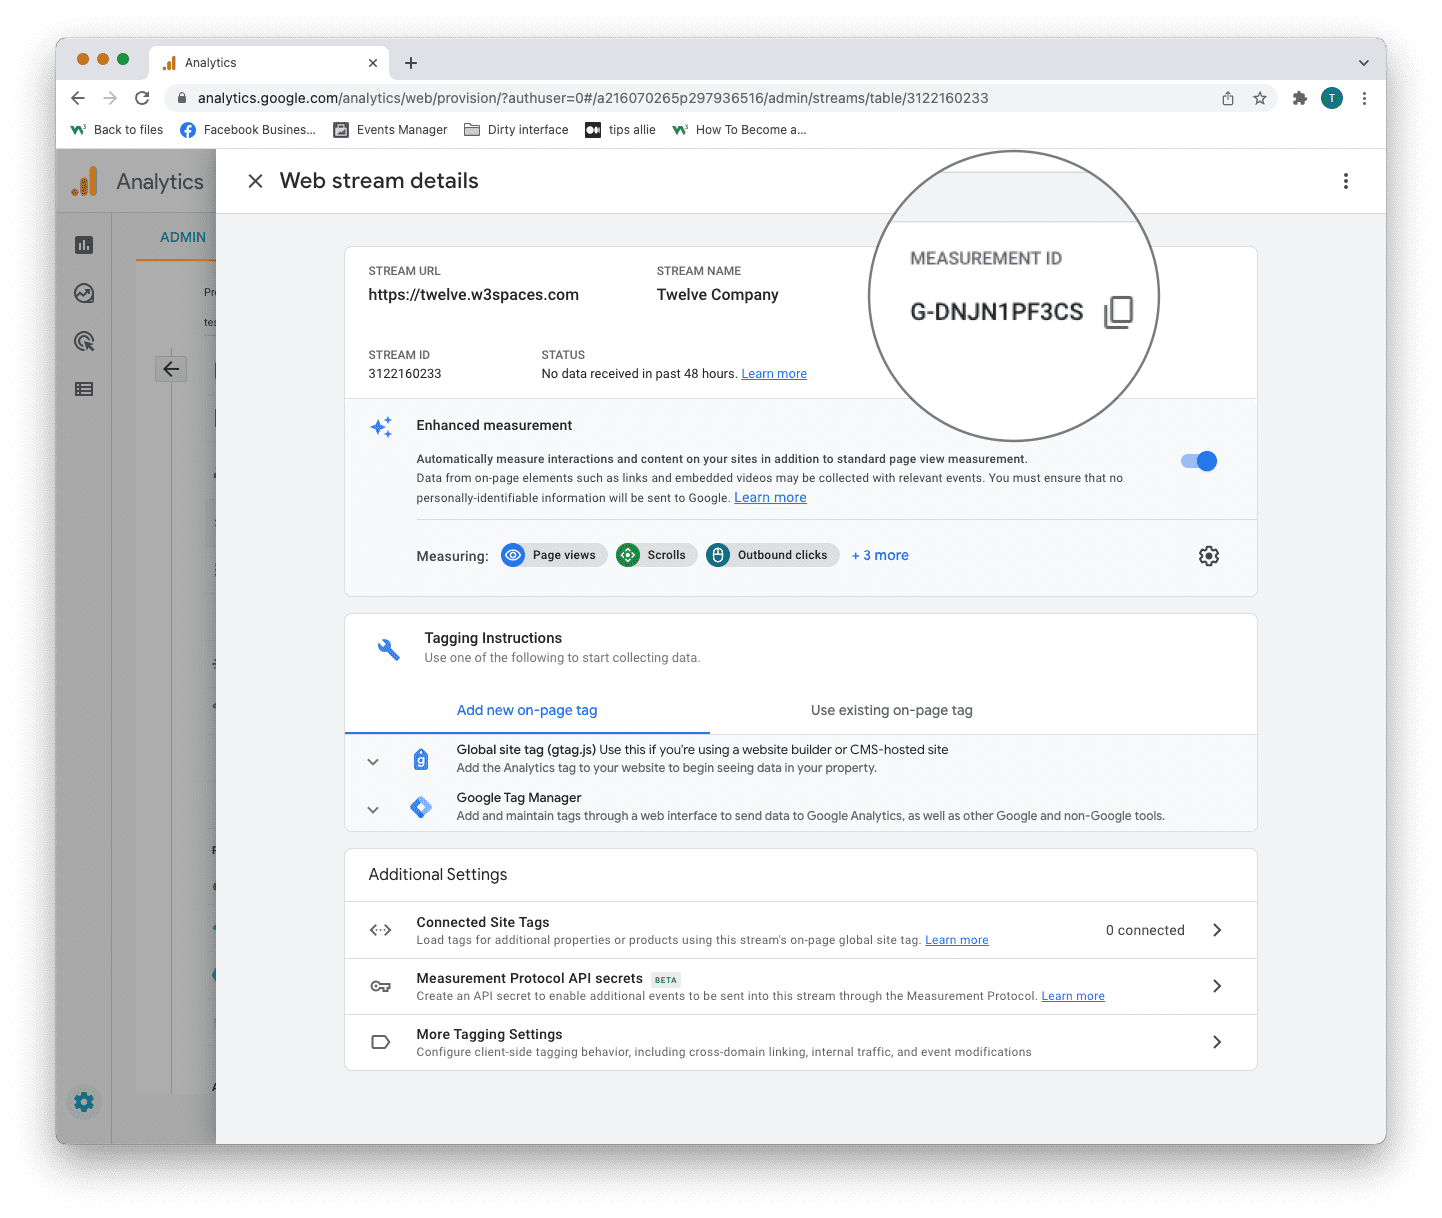
Google Analytics 4 uses Measurement ID. Older versions use Tracking ID. You can not have both.
3. Tagging instructions
Decide to use Global site tag (gtag.js) or Tag manager.
This tutorial will use the Global site tag.
Installing the Global site tag is the easiest and quickest way of getting it up and running.
Step 11: Global site tag (gtag.js)
Click the "Global site tag (gtag.js)" row.
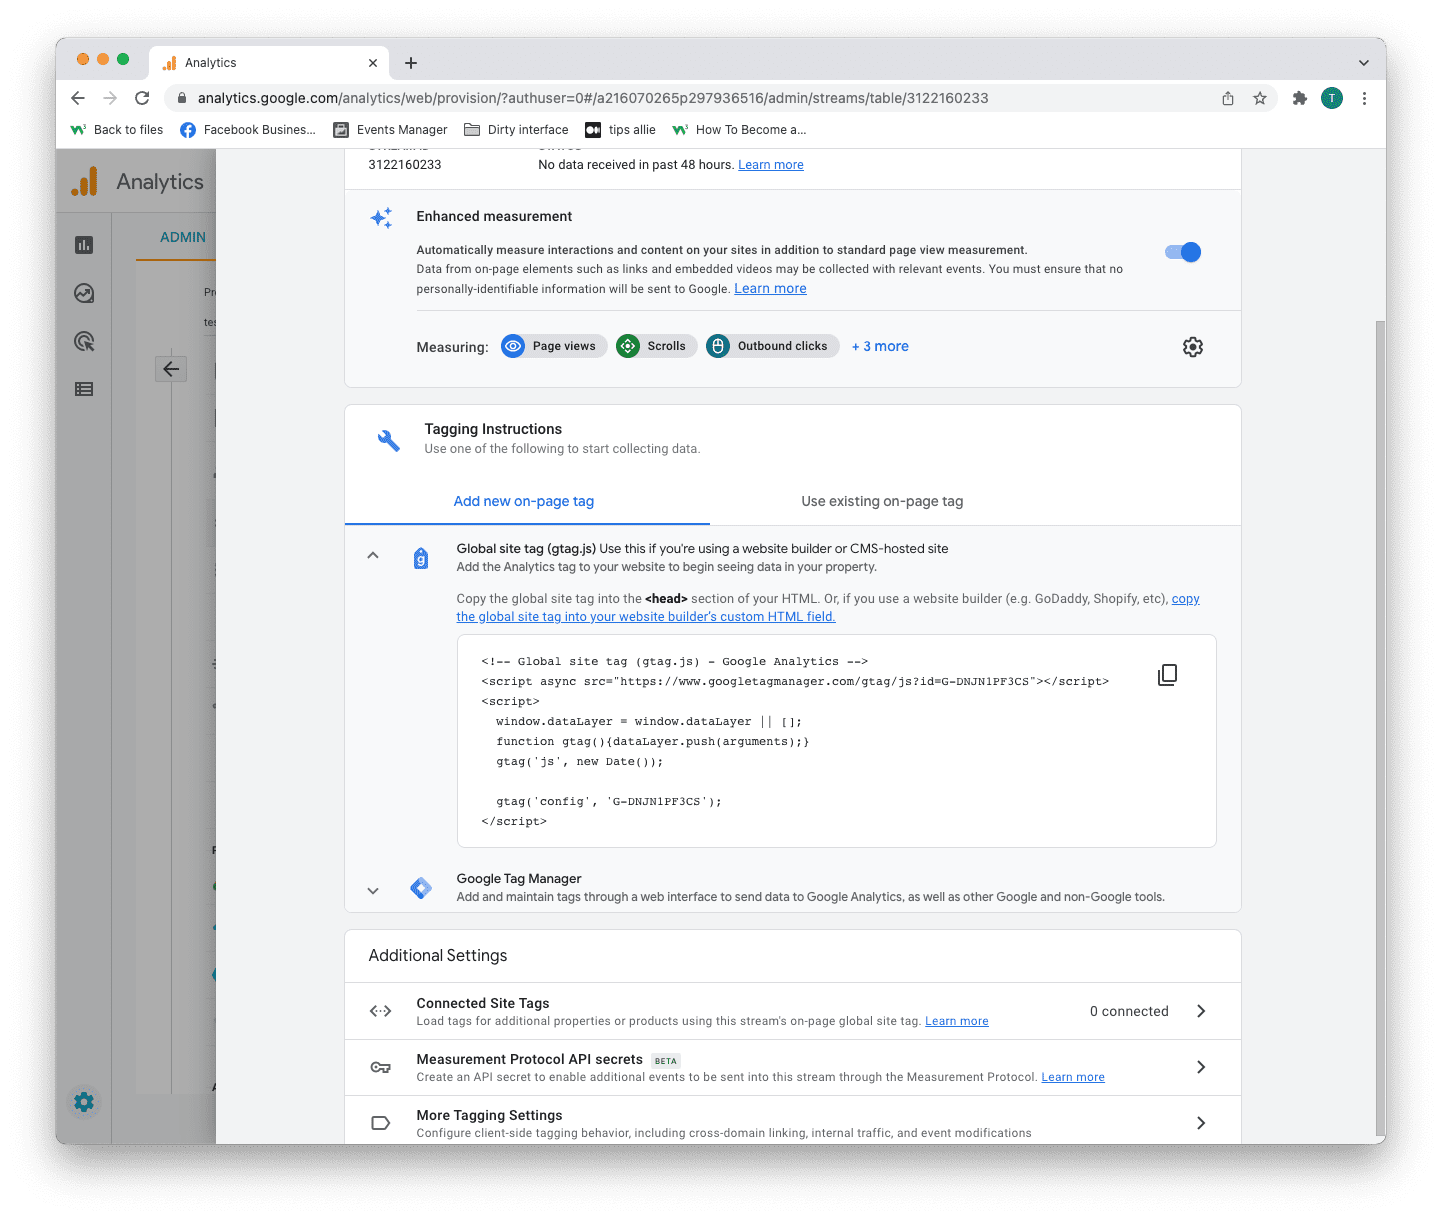
Here you can see a code snippet.
The code snippet is a script to allow Google to measure data on your site.
You can see the Measurement ID in the second last line in the code snippet.
The code snippet
<!-- Global site tag (gtag.js) - Google Analytics -->
<script async src="https://www.googletagmanager.com/gtag/js?id=G-DNJN1PF3CS"></script>
<script>
window.dataLayer = window.dataLayer || [];
function gtag(){dataLayer.push(arguments);}
gtag('js', new Date());
gtag('config', 'G-XXXXXXX');
</script>
Step 12: Enter the code snippet
Copy the code snippet.
Make sure to include your Measurement ID.
Locate the <head> tag in your HTML.
Paste the code snippet just below the <head> tag.
Save and publish the code.
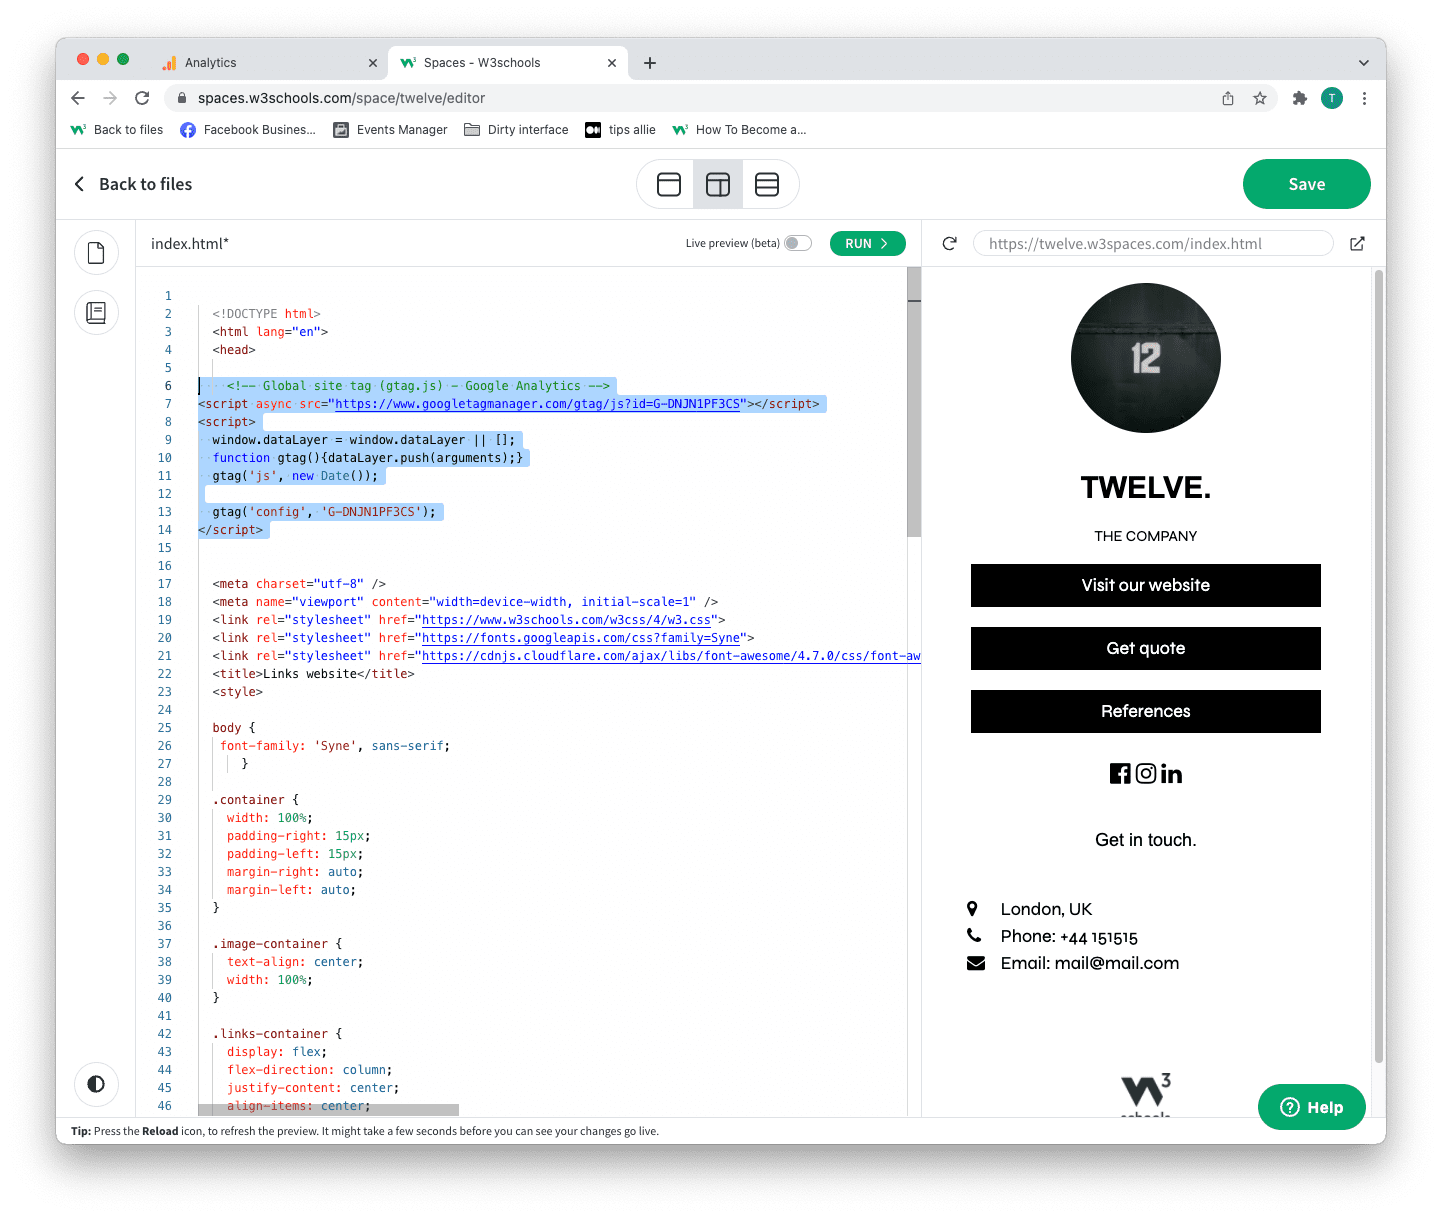
We used W3Schools Spaces in this example.
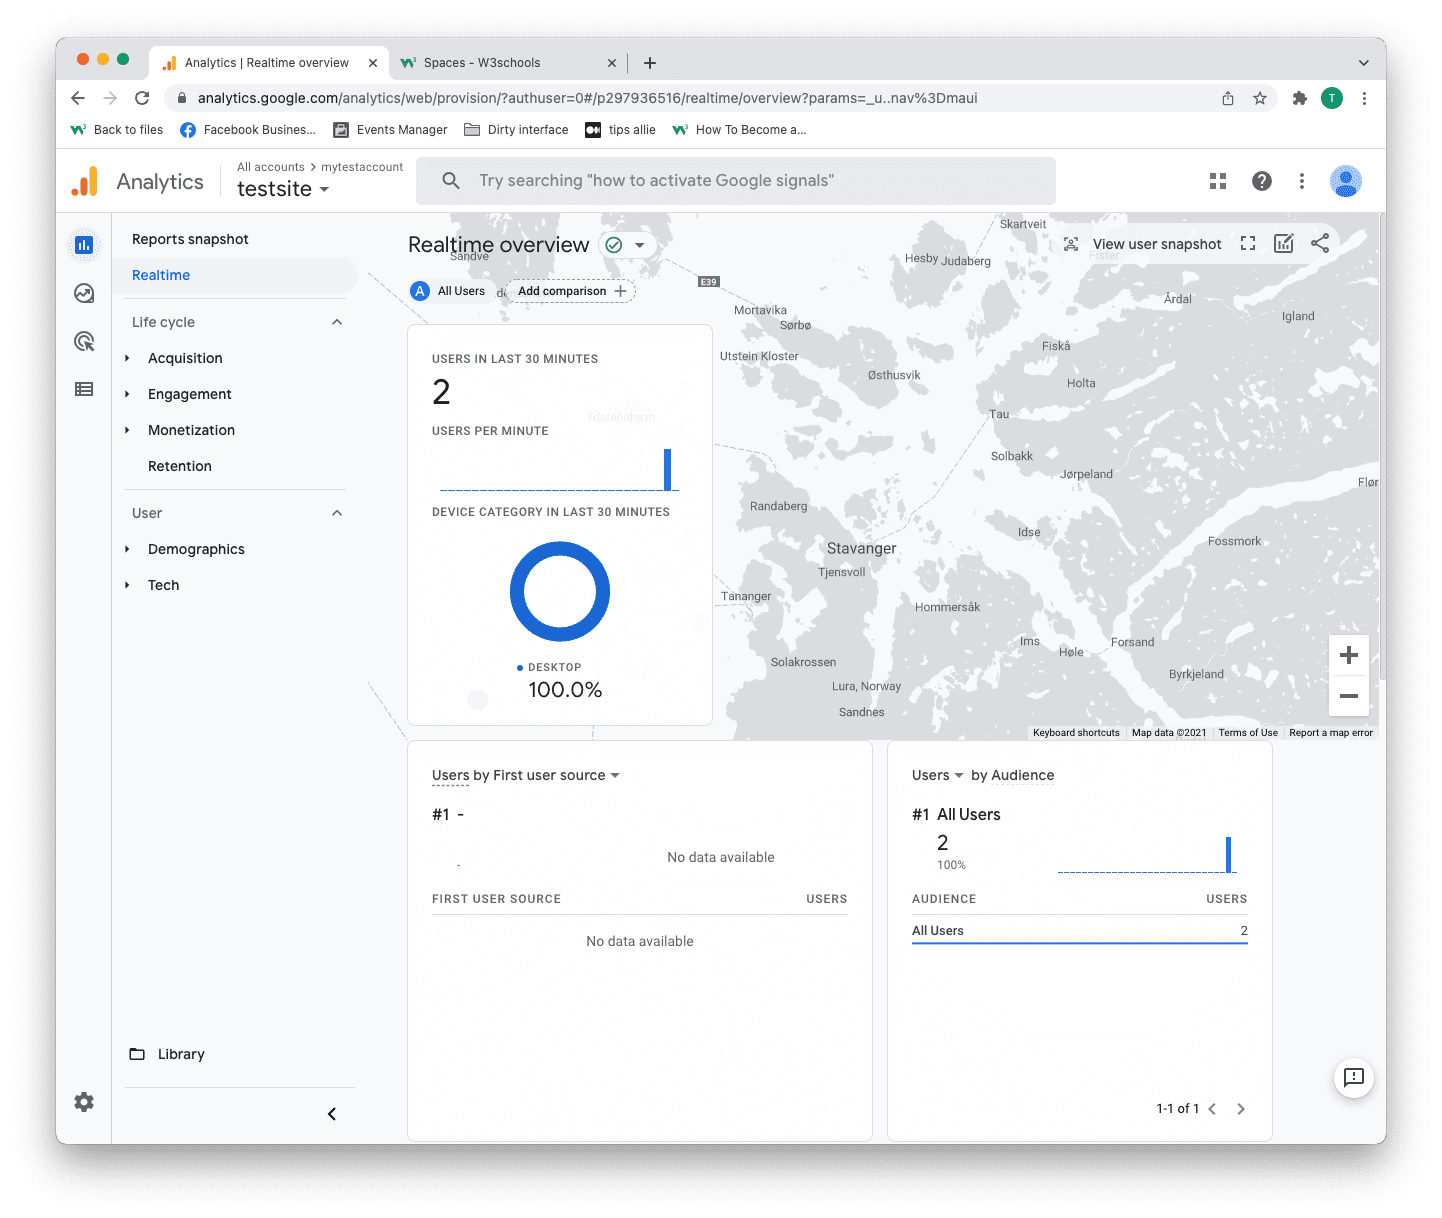
Step 13: Test that it works
Ensure that you have successfully saved and published the code snippet with the correct Measurement ID.
Open the URL for the site you have connected to the data stream.
Click on "Real time" on the menu to the left.
Confirm that you see yourself as an active user.
Congrats. You have successfully enabled Google Analytics for your site!
Explore Google Analytics
Recommended related topics are Tag manager and Events
Spend time in the service to learn about your user activity, commerce, demographics, device, and referrals.
Tip: Ever heard of W3Schools Spaces? It is a personal space where you can make a website from scratch or use a template and host it for free.
It has everything you need in the browser.
Get started in a few clicks.
Start now for free ❯* no credit card required